API Gateway Authorization
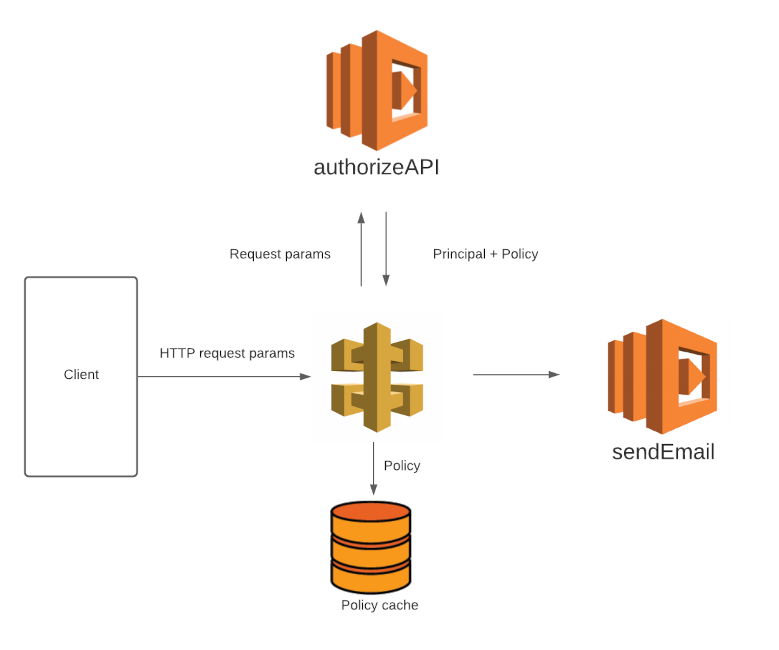
In the previous chapter, we learned how to execute a Lambda function via API Gateway. Now, let’s add some authorization to our API. We can use another Lambda function to authorize requests made to API Gateway. The easiest way to embed authorization in a client request is to add authorization params to the request. API Gateway will route the request params to the Lambda function being used for authorization. The auth function is expected to return two objects: a Principal and a Policy.
Authorization Function
Our authorization function has two responsibilities:
- Verify the presence of the authorization token
- Return an appropriate response
The simplest solution to authorization is to authorize specific computers to make a request. That wouldn’t work in this case, because Phil’s customers could be using any computer, phone or tablet to access Phil’s website. Phil has no knowledge or control over the IP address of the computers which will be making the API request.
The next simplest solution is to authorize based upon a token, or basically, a password. Requests which include the token will be authorized, and those with an invalid or missing token will not be authorized. The client browser can include the token in the request.
I’d like to pause and consider the security implications of this decision. Anyone who has access to the token will be able to make a request to the API. If you save the token in your Javascript files as part of your static website, then your API can be used by anyone on the internet who crawls your website. A simple way to solve this is by retrieving the token as part of the client request. Still, anyone who has access to your static site can invoke the API as many times as they please. For this reason, you might find it valuable to put a limit on how many times your API can execute, as sort of a fail-safe.
Authorization function
I created a simple authorization function, modified from some AWS code. I named the token param authtoken, and set the token to supersecretvalue.
Here are the steps you need to take to set up your own authorization function. These instructions assume you have some familiarity with the AWS Console.
- Create a new Lambda function. I named mine
authorizeAPI. Populateindex.js. - Create a new authorizer in API Gateway. I named mine
token-authorizer.- Set Lambda Function as
authorizeAPI. - Add an Identity Source Header named
authtoken. - Click Create.
- Set Lambda Function as
Let’s test the authorizer. Click Test to enter the test configuration interface, and enter the following values into the request parameters:

Click Test to execute the test. You should receive a copy of the Allow policy, as a response. Well done! We are almost there.
Deployment
The final step is to deploy the API. In the AWS Console, navigate to API Gateway. Click Resources, select the Action dropdown and select Deploy API. As part of deployment configuration, you’ll need to choose a Deployment stage. I named my stage prod to signify production.
Testing our API
You might want to test outside of the AWS ecosystem. I like to use Postman because I find the graphical interface helpful. Of course, you can use a number of tools to make an HTTP request, including Python or any other lanuage.
Remember that an HTTP request has 3 components:
- method and path
- headers
- body
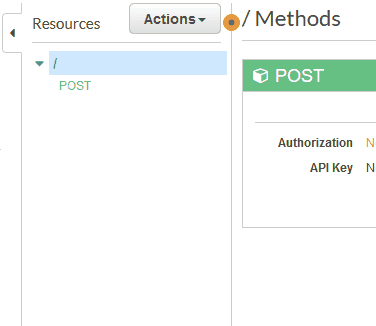
In our case, the method is a POST method. You can find the path of your production API by selecting your API, and clicking Stages in the API Gateway console. The prod stage should have a large Invoke URL at the top of the page. This is the request path. The headers need to include the authtoken, but we don’t need a message body.
If you make a request with the authtoken header, you should be able to trigger your API! In this case, the API should trigger an email to be sent (which we covered in Chapter 1). Verify the email in your inbox, and celebrate!