API Gateway Introduction
This is the second chapter of the guide explaining how to build a serverless notification system using AWS. In the first chapter, we built a Lambda function which is capable of sending an email via SES. In this chapter we will learn how to transmit data in AJAX requests from the client to API Gateway.
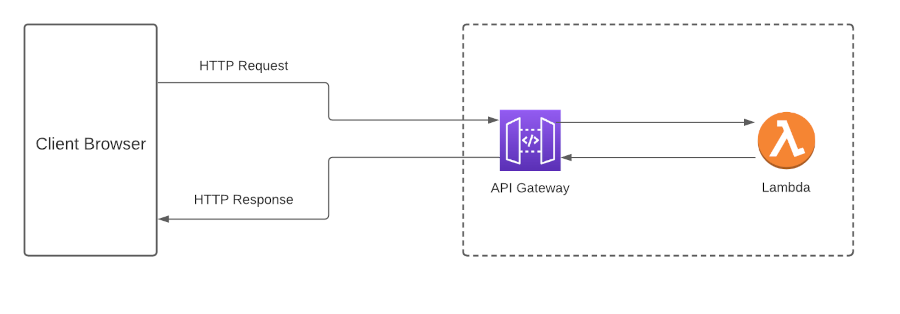
Now that we have a Lambda function, we need to make it available as an API to our frontend. We can do this using API Gateway, another Serverless service offered by AWS. API Gateway acts as a connector between the client browser and your Lambda function. Our goal is for your users to be able to trigger your Lambda function, from within their browser.
REST and HTTP
Before we do that, let’s take a moment to discuss REST APIs and HTTP requests. REST is an interface specification which can be applied to the architecture of application-layer systems. I like to think of APIs as contracts which determine how data is exchanged between a consumer and a provider. In this case, the consumer is the client browser and the provider is the server running the Lambda function.
In a REST API, the client sends HTTP requests, and the server replies with HTTP responses. HTTP requests have three components: a method, headers, and an optional message body. Examples of request methods include GET, and POST. Headers and the message body contain the information which is transmitted as part of the request or response.
In our system, the client browser will make HTTP requests, and the API will reply with HTTP responses. We have several proxies standing between the client browser and the server executing the Lambda function, the most significant being the API Gateway.
Create an API
In the AWS Console, navigate to API Gateway and click the orange button to create a new API. API Gateway presents you with four options:
- HTTP API
- WebSocket API
- REST API
- REST API (Private)
It’s interesting that API Gateway makes a distinction between HTTP APIs and REST APIs, because REST is an interface specification and HTTP is a data transmission protocol. That is to say, all REST APIs will incorporate HTTP requests. However, all HTTP requests are not necessarily part of a RESTful interface.
Semantics aside, it seems that the HTTP option requires less setup. It also seems that the HTTP option is a more recent feature with less documentation. For this reason, we will select the REST option. Create a REST API using the default configuration options. I titled mine create-email-api.
POST Method
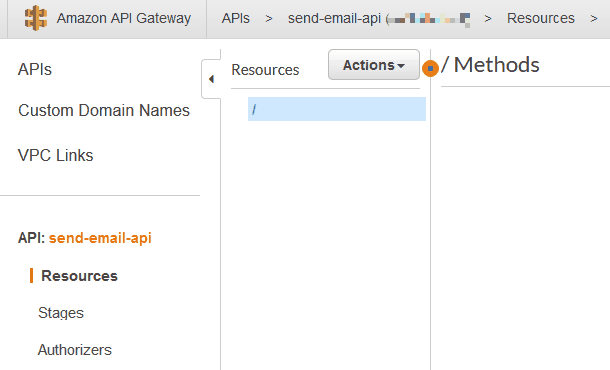
Once you have created the API, you will need to create a method. Create a POST method in the console, associated with the root resource. This API only has one responsibility (sending an email) and therefore only needs one resouce. For this reason, we can assign our methods to the root path.
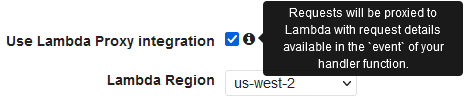
Before you save your method, you’ll need to fill in some configuration details. Select the Lambda Function integration type, and create a Lambda Proxy integration. Then, enter the name of your Lambda function. In the previous step, we named our function sendEmail.
API Gateway offers the option of transforming the data in our request before invoking the Lambda function. In our case, we don’t need to perform any transformation, and we can simply forward the request to the Lambda function. For this reason, we want to make this integration a Lambda proxy integration. Proxy integrations do not transform requests or responses between the client and the Lambda function.
Lambda Function Response
Since we are using a proxy integration, the Lambda function must return a response in the format expected by API Gateway. If you take a look at the sendEmail function we constructed in the last chapter, you can see that it is currently returning 0. Let’s change this response to an acceptable HTTP response.
// index.js

function constructSuccessResponse() {
  let responseBody = {
    message: "Succesfully sent email"
  };

  let response = {
      statusCode: 200,
      body: JSON.stringify(responseBody)
  };

  return response;
}
In the Lambda function handler, construct and return the response after the sendEmail promise has been resolved.
// index.js

exports.handler = async function (event) {
  ...
  await ses.sendEmail(params).promise();

  let response = constructSuccessResponse();
  return response;
};
Deploy and test your code! It is worth noting that we only constructed a successful response. That is because if there is an error with the execution of the Lambda function, the function will terminate and respond with an error response.
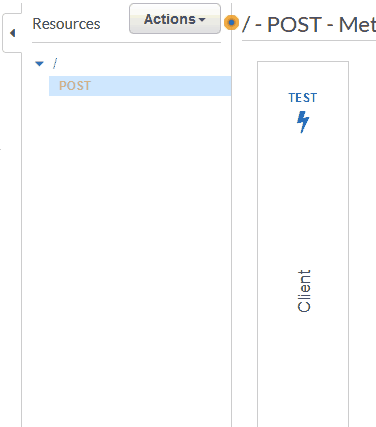
The next step is to test the execution of the Lambda function via API Gateway. Navigate to API Gateway in the console, and select the POST method which we created earlier. Select TEST and head to the testing interface.
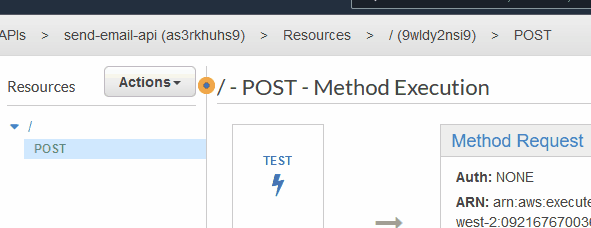
Click the blue “Test” button at the bottom of the page. If the Lambda function executes successfully, the response body will be visible. You can also view the status code (which should be 200) and the execution logs.
CORS
Now that we have created a resource to handle the POST request, we will need to enable CORS on the resource. CORS is a protocol that governs how endpoints respond to requests from other websites. In particular, CORS is going to verify the presence of three headers in the API’s response: Access-Control-Allow-Headers, Access-Control-Allow-Origin, and Access-Control-Allow-Methods.
Many browsers will make a preflight request before issuing a CORS request, to ensure that the server is aware of CORS. The preflight request is an OPTIONS request, and the browser will verify the response before issuing the POST request. If the server issues an incomplete or missing response to the OPTIONS request, the browser will skip the POST request.
Use the AWS Console to enable CORS. Select the Resources pane. Within the Actions menu, select the option Enable CORS. You’ll need to add the header authtoken to the list of Access-Control-Allow-Headers. You will also be able to see that there are two Access-Control-Allow-Methods: POST, and OPTIONS. The CORS wizard is going to add the OPTIONS resource for us, so that our API can fulfill the preflight request.